Jenkins test run: Our first Jenkins build job
Contents
Finally, we’ve reached the point where it all comes together. So far we’ve installed Java JDK, Nexus, Maven, Jenkins, and Tomcat on the Ubuntu server. The last step of this Jenkins installation walkthrough is to configure a Jenkins build job which will deploy our web application to the Tomcat web container if compilation and test phases of our Java project were successful.
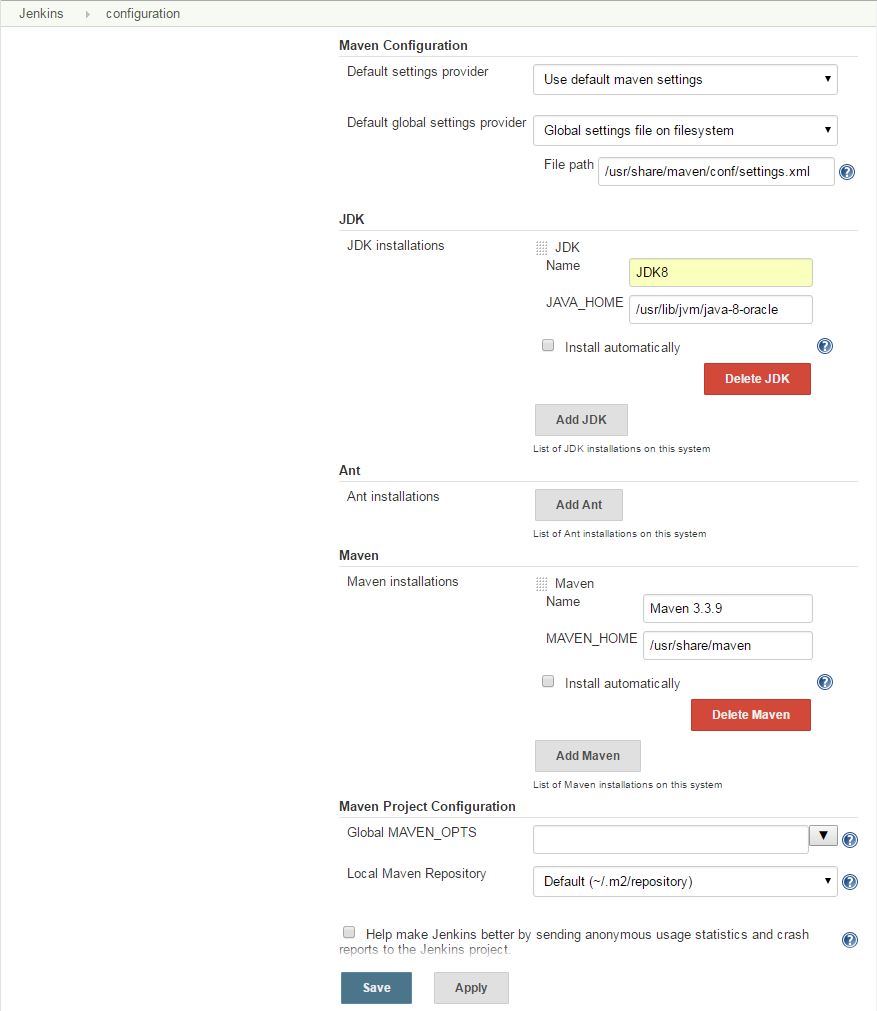
For Jenkins to find Java and Maven, we first need to add some global Jenkins settings in Jenkin’s configuration page. There you’ll find an empty JDK and Maven section. Here you must add (uncheck the “Install automatically” checkbox) the JDK and Maven installation we’ve done previously. Enter JDK 8 and Maven 3.3.9 as names. The required paths can easily be retrieved by entering java -version and mvn -version in our Ubuntu server terminal session.
Now we are ready to create our first Jenkins Maven build job.
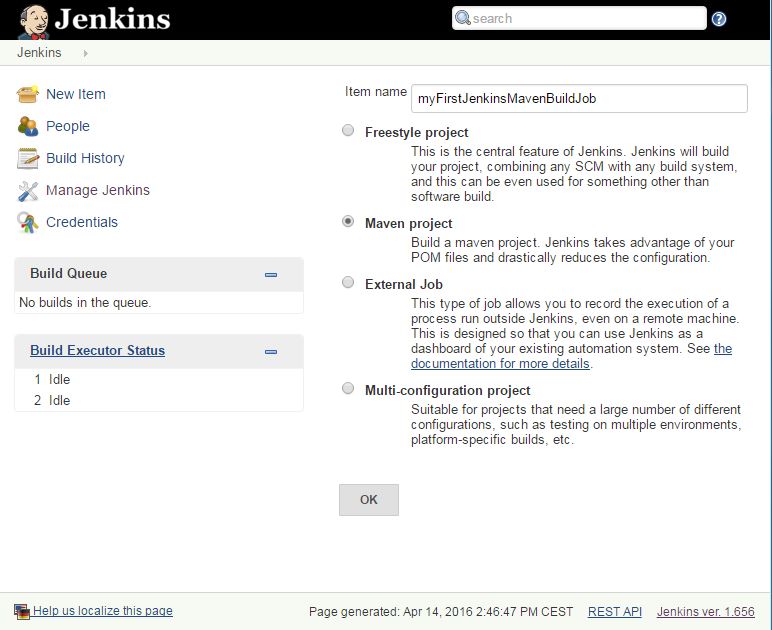
After clicking on ‘OK’, you can enter the correct settings for your organization:
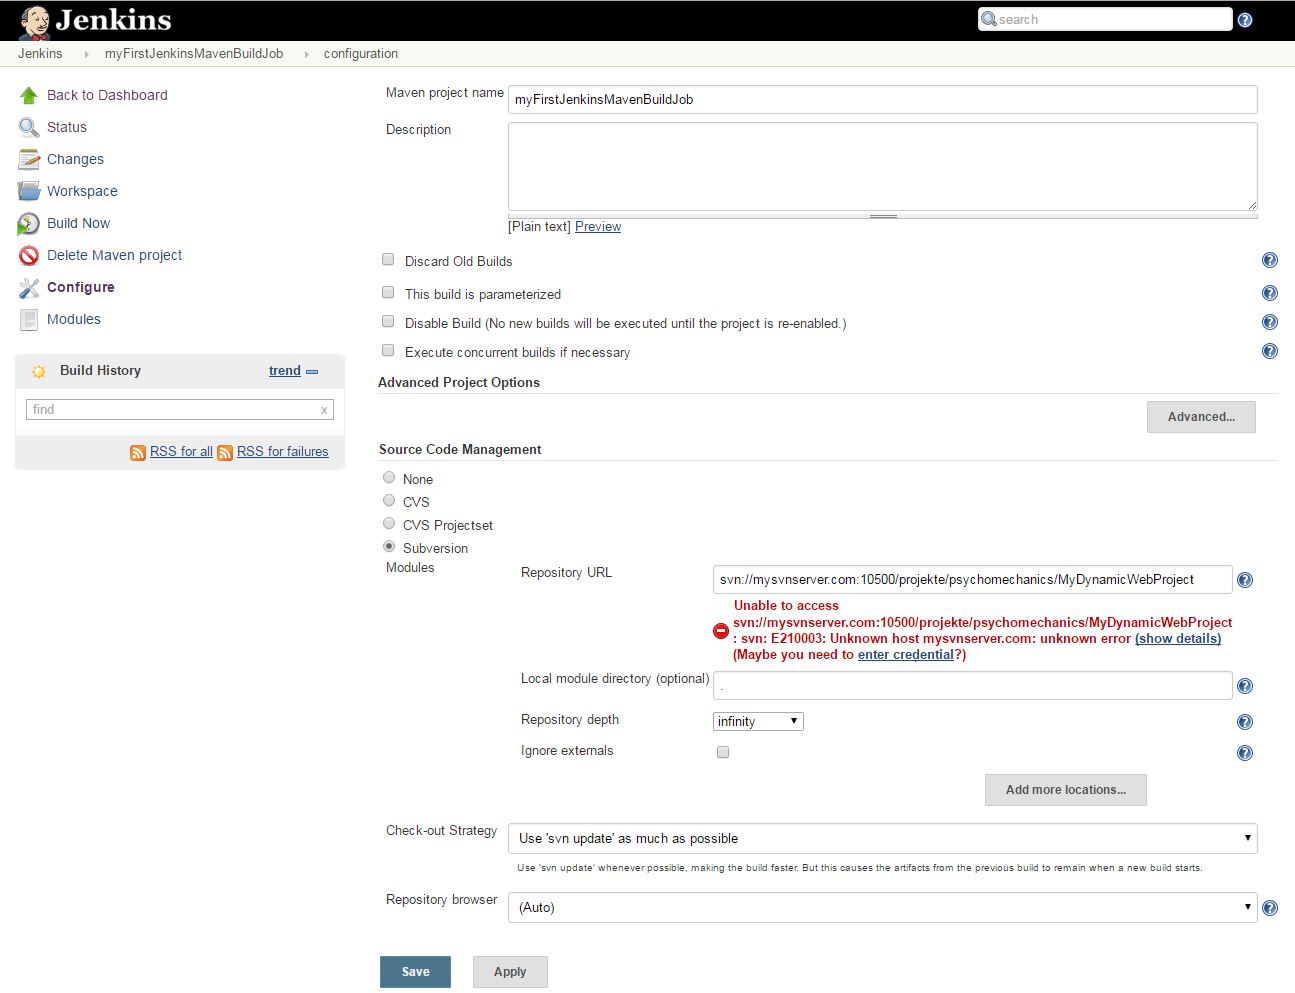
In summary, this is what you need to know when creating a new job:
Select ‘Subversion’ under ‘SourceControl Management’ and enter the Repository URL to your Subversion project, e.g., svn://localhost/project_zen/trunk
Further down, select the SCM Polling checkbox and enter a convenient value like H/5 * * * *
In the ‘Build’ section, we define the build goals as clean deploy tomcat7:deploy
You might remember that we specified the Tomcat server in the Tomcat7 plugin of our software project’s POM as http://localhost:8080/manager/text. If you set up your Tomcat server differenty, like on another server, or listening to another port, this URL won’t work. In this case, you need to create a Maven profile which you activate in the Jenkins ‘Build’ job configuration by specifying the correct profile to use. Example: clean deploy tomcat7:deploy -PJenkins.
