mySQL Docker container
Contents
Lets start with the official mySQL Docker image https://hub.docker.com/_/mysql. It contains everything we need to create and use the sakila demo database later.
docker run --name mysql-server -p 3306:3306 -v [YOUR_LOCAL_PATH_TO_SAKILA]:/var/lib/mysql -e MYSQL_ROOT_PASSWORD=my-secret-pw -d mysql:8.0.23

You must replace the portion [YOUR_LOCAL_PATH_TO_SAKILA] to an empty local directory. It will automatically receive a copy of the sakila database from the docker container later!
If the above docker run command is run for the first time, docker will automatically download the predefined mySQL image from docker hub if it can’ find it locally. Pay special attention to the -v parameter.

–name The name of the container for future reference
-d Detach: runs a Docker container in the background
-p Port: The port number which the mySQL Dabase engine in the container listens to and which the container has exported for the outside world
-e Environment: The environment variable MYSQL_ROOT_PASSWORD makes sure you can connect to the database using the “root” user. “my-secret-pw” is the password to be set.
-v Volume: In order to persist the sakila database, we have to create a shared volume between the persistent file system on the development workstation and the non-persistent folder in the mysql-server container where mysql will store the sakila database.
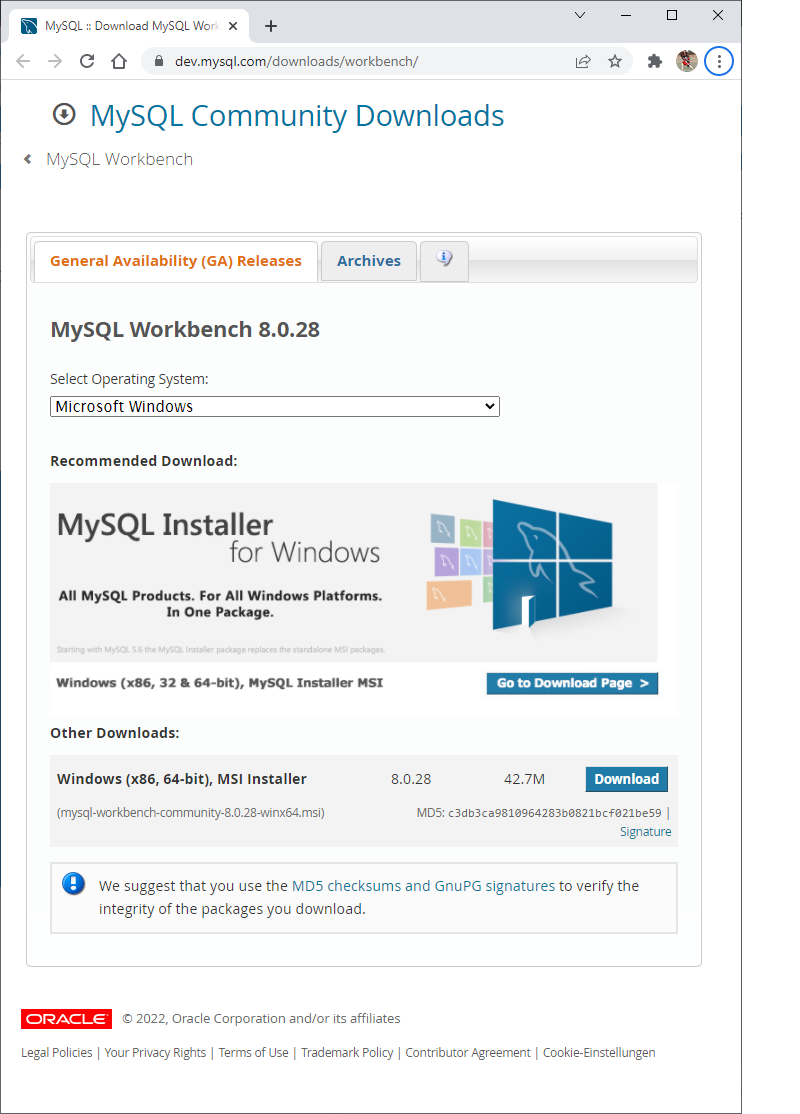
When the mysql-server container is running put it aside because its not needed for the next steps. What we have to do is to create the sakila database and fill it with data. There are plenty of graphical SQL Database tools available for that purpose. For simplicity sake, use the mySQL Workbench. It can be download from https://dev.mysql.com/downloads/workbench/ You don’t need to download the mySQL-Installer, just click on the blue “Download” button.
Install the mySQL Workbench on your workstation and launch it. We have to create a database connection from the mySQL Workstation application to the mySQL database engine in the mySQL docker container. To do so, click on “Setup New Connection”. Take the values from the following screenshot:
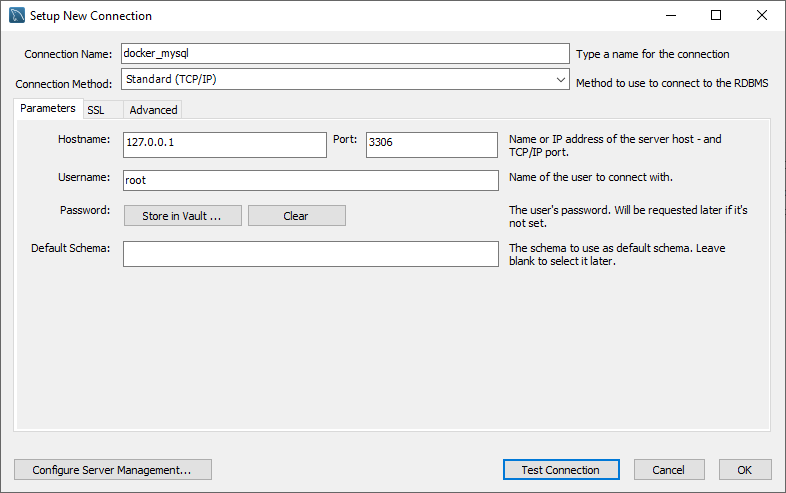
Before confirming the dialog with OK, click on the “Test Connection” button. Enter the root password which we specified when we created the mySQL docker container: my-secret-pw
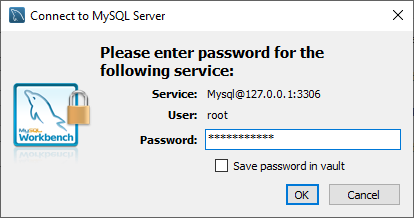
That’s an important step. If the mySQL Workbanch can’t establish a connection to 127.0.0.1:3306, something is wrong with the mysql-server container.
Now grab a copy of the sakila database creation files from https://downloads.mysql.com/docs/sakila-db.zip and unzip the archive to your workstation storage. We will use sakila-schema.sql file to create the sakila database and its tables. The sakila-data.sql will fill the tables with data.
If mySQL Workbench succeeded opening a connection to the mySQL database engine in the docker container, you should see something like this:
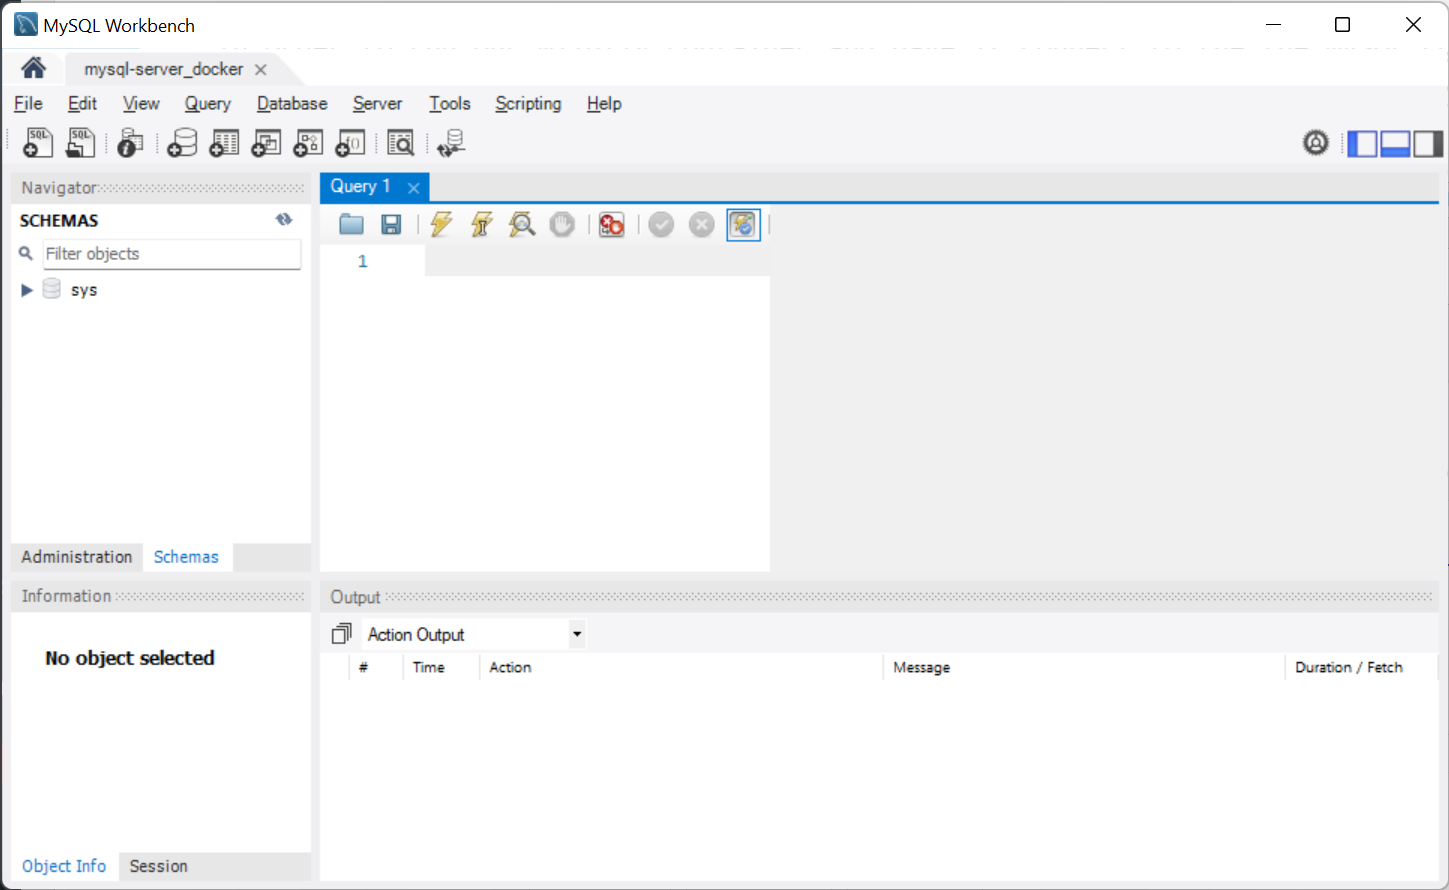
In the “Query 1”-pane of the window click on the folder-icon “Open a script file in this editor” and select the sakila-schema.sql> file. Then click on the lightning-icon “Execute the selected portion of the script or everything, if there is no selection”. After that you need to refresh the navigator pane on the left by richt-clicking in there and selecting “Refresh All”. Repeat these steps but select the sakila_data.sql this time.
That’s all there is to create the sakila database.